Ruan Bekker's Blog

From a Curious mind to Posts on Github

Setup a 3 Node Replicated Storage Volume With GlusterFS

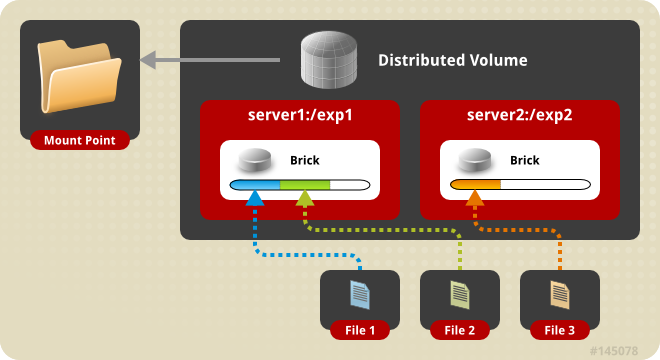
In one of my earlier posts on GlusterFS, we went through the steps on how to setup a Distributed Storage Volume, where the end result was to have scalable storage, where size was the requirement.

ruanbekker-cheatsheets

What will we be doing today with GlusterFS?

Today, we will be going through the steps on how to setup a Replicated Storage Volume with GlusterFS, where we will have 3 GlusterFS Nodes, and using the replication factor of 3.

Replication Factor of 3:

In other words, having 3 copies of our data and in our case, since we will have 3 nodes in our cluster, a copy of our data will reside on each node.

What about Split-Brain:

In Clustering, we get the term Split-Brain, where a node dies or leaves the cluster, the cluster reforms itself with the available nodes and then during this reformation, instead of the remaining nodes staying with the same cluster, 2 subset of cluster are created, and they are not aware of each other, which causes data corruption, here’s a great resource on Split-Brain

To prevent Split-Brain in GlusterFS, we can setup a Arbiter Volume. In a Replica Count of 3 and Arbiter count of 1: 2 Nodes will hold the replicated data, and the 1 Node which will be the Arbiter node, will only host the file/directory names and metadata but not any data. I will write up an article on this in the future.

Getting Started:

Let’s get started on setting up a 3 Node Replicated GlusterFS. Each node will have an additional drive that is 50GB in size, which will be part of our GlusterFS Replicated Volume. I will also be using Ubuntu 16.04 as my linux distro.

Preparing DNS Resolution:

I will install GlusterFS on each node, and in my setup I have the following DNS entries:

  • gfs01 (10.0.0.2)
  • gfs02 (10.0.0.3)
  • gfs03 (10.0.0.4)

Preparing our Secondary Drives:

I will be formatting my drives with XFS. Listing our block volumes:

1
2
3
4
$ lsblk
NAME MAJ:MIN RM  SIZE RO TYPE MOUNTPOINT
vdb  253:16   0 46.6G  0 disk
vda  253:0    0 18.6G  0 disk /

Creating the FileSystem with XFS, which we will be running on each node:

1
$ mkfs.xfs /dev/vdb

Then creating the directories where our bricks will reside, and also add an entry to our /etc/fstab so that our disk gets mounted when the operating system boots:

1
2
3
4
5
6
7
8
9
10
11
12
13
14
15
16
17
# node: gfs01
$ mkdir /gluster/bricks/1 -p
$ echo '/dev/vdb /gluster/bricks/1 xfs defaults 0 0' >> /etc/fstab
$ mount -a
$ mkdir /gluster/bricks/1/brick

# node: gfs02
$ mkdir /gluster/bricks/2 -p
$ echo '/dev/vdb /gluster/bricks/2 xfs defaults 0 0' >> /etc/fstab
$ mount -a
$ mkdir /gluster/bricks/2/brick

# node: gfs03
$ mkdir /gluster/bricks/3 -p
$ echo '/dev/vdb /gluster/bricks/3 xfs defaults 0 0' >> /etc/fstab
$ mount -a
$ mkdir /gluster/bricks/3/brick

After this has been done, we should see that the disks are mounted, for example on node: gfs01:

1
2
3
4
$ df -h
Filesystem      Size  Used Avail Use% Mounted on
/dev/vda         18G  909M   17G   3% /
/dev/vdb         47G   80M   47G   1% /gluster/bricks/1

Installing GlusterFS on Each Node:

Installing GlusterFS, repeat this on all 3 Nodes:

1
2
3
$ apt update && sudo apt upgrade -y
$ apt install xfsprogs attr glusterfs-server glusterfs-common glusterfs-client -y
$ systemctl enable glusterfs-server

In order to add the nodes to the trusted storage pool, we will have to add them by using gluster peer probe. Make sure that you can resolve the hostnames to the designated IP Addresses, and that traffic is allowed.

1
2
3
$ gluster peer probe gfs01
$ gluster peer probe gfs02
$ gluster peer probe gfs03

Now that we have added our nodes to our trusted storage pool, lets verify that by listing our pool:

1
2
3
4
5
$ gluster pool list
UUID                                    Hostname                State
f63d0e77-9602-4024-8945-5a7f7332bf89    gfs02                   Connected
2d4ac6c1-0611-4e2e-b4af-9e4aa8c1556d    gfs03                   Connected
6a604cd9-9a9c-406d-b1b7-69caf166a20e    localhost               Connected

Great! All looks good.

Create the Replicated GlusterFS Volume:

Let’s create our Replicated GlusterFS Volume, named gfs:

1
2
3
4
5
6
7
$ gluster volume create gfs \
  replica 3 \
  gfs01:/gluster/bricks/1/brick \
  gfs02:/gluster/bricks/2/brick \
  gfs03:/gluster/bricks/2/brick

volume create: gfs: success: please start the volume to access data

Now that our volume is created, lets list it to verify that it is created:

1
2
$ gluster volume list
gfs

Now, start the volume:

1
2
$ gluster volume start gfs
volume start: gfs: success

View the status of our volume:

1
2
3
4
5
6
7
$ gluster volume status gfs
Status of volume: gfs
Gluster process                             TCP Port  RDMA Port  Online  Pid
------------------------------------------------------------------------------
Brick gfs01:/gluster/bricks/1/brick         49152     0          Y       6450
Brick gfs02:/gluster/bricks/2/brick         49152     0          Y       3460
Brick gfs03:/gluster/bricks/3/brick         49152     0          Y       3309

Next, view the volume inforation:

1
2
3
4
5
6
7
8
9
10
11
12
$ gluster volume info gfs

Volume Name: gfs
Type: Replicate
Volume ID: 6f827df4-6df5-4c25-99ee-8d1a055d30f0
Status: Started
Number of Bricks: 1 x 3 = 3
Transport-type: tcp
Bricks:
Brick1: gfs01:/gluster/bricks/1/brick
Brick2: gfs02:/gluster/bricks/2/brick
Brick3: gfs03:/gluster/bricks/3/brick

Security:

From a GlusterFS level, it will allow clients to connect by default. To authorize these 3 nodes to connect to the GlusterFS Volume:

1
$ gluster volume set gfs auth.allow 10.0.0.2,10.0.0.3,10.0.0.4

Then if you would like to remove this rule:

1
$ gluster volume set gfs auth.allow *

Mount the GlusterFS Volume to the Host:

Mount the GlusterFS Volume to each node, so we will have to mount it to each node, and also append it to our /etc/fstab file so that it mounts on boot:

1
2
$ echo 'localhost:/gfs /mnt glusterfs defaults,_netdev,backupvolfile-server=localhost 0 0' >> /etc/fstab
$ mount.glusterfs localhost:/gfs /mnt

Verify the Mounted Volume:

Check the mounted disks, and you will find that the Replicated GlusterFS Volume is mounted on our /mnt partition.

1
2
3
4
5
$ df -h
Filesystem      Size  Used Avail Use% Mounted on
/dev/vda         18G  909M   17G   3% /
/dev/vdb         47G   80M   47G   1% /gluster/bricks/1
localhost:/gfs   47G   80M   47G   1% /mnt

You will note that GlusterFS Volume has a total size of 47GB usable space, which is the same size as one of our disks, but that is because we have a replicated volume with a replication factor of 3: (47 * 3 / 3)

Now we have a Storage Volume which has 3 Replicas, one copy on each node, which allows us Data Durability on our Storage.

Container Persistent Storage for Docker Swarm Using a GlusterFS Volume Plugin

From one of my previous posts I demonstrated how to provide persistent storage for your containers by using a Convoy NFS Plugin.

I’ve stumbled upon one AWESOME GlusterFS Volume Plugin for Docker by @trajano, please have a look at his repository. I’ve been waiting for some time for one solid glusterfs volume plugin, and it works great.

ruanbekker-cheatsheets

What we will be doing today

We will setup a 3 node replicated glusterfs volume and show how easy it is to install the volume plugin and then demonstrate how storage from our swarms containers are persisted.

Our servers that we will be using will have the private ip’s as shown below:

1
2
3
10.22.125.101
10.22.125.102
10.22.125.103

Setup GlusterFS

Have a look at this post to setup the glusterfs volume.

Install the GlusterFS Volume Plugin

Below I’m installing the plugin and setting the alias name as glusterfs, granting all permissions and keeping the plugin in a disabled state.

1
$ docker plugin install --alias glusterfs trajano/glusterfs-volume-plugin --grant-all-permissions --disable

Set the glusterfs servers:

1
$ docker plugin set glusterfs SERVERS=10.22.125.101,10.22.125.102,10.22.125.103

Enable the glusterfs plugin:

1
$ docker plugin enable glusterfs

Create a Service in Docker Swarm

Deploy a sample service on docker swarm with a volume backed by glusterfs. Note that my glusterfs volume is called gfs

1
2
3
4
5
6
7
8
9
10
11
12
13
14
15
16
17
18
19
version: "3.4"

services:
  foo:
    image: alpine
    command: ping localhost
    networks:
      - net
    volumes:
      - vol1:/tmp

networks:
  net:
    driver: overlay

volumes:
  vol1:
    driver: glusterfs
    name: "gfs/vol1"

Deploy the stack:

1
2
$ docker stack deploy -c docker-compose.yml test
Creating service test_foo

Have a look on which node is your container running:

1
2
3
$ docker service ps test_foo
ID                  NAME                IMAGE               NODE                DESIRED STATE       CURRENT STATE            ERROR               PORTS
jfwzb7yxnrxx        test_foo.1          alpine:latest       swarm-worker-1      Running             Running 37 seconds ago

Now jump to the swarm-worker-1 node and verify that the container is running on that node:

1
2
3
$ docker ps
CONTAINER ID        IMAGE                                          COMMAND                  CREATED             STATUS                  PORTS               NAMES
d469f341d836        alpine:latest                                  "ping localhost"           59 seconds ago      Up 57 seconds                               test_foo.1.jfwzb7yxnrxxnd0qxtcjex8lu

Now since the container is running on this node, we will also see that the volume defined in our task configuration will also be present:

1
2
3
$ docker volume ls
DRIVER                       VOLUME NAME
glusterfs:latest             gfs/vol1

Exec into the container and look at the disk layout:

1
2
3
4
5
$ docker exec -it d469f341d836 sh
/ # df -h
Filesystem                Size      Used Available Use% Mounted on
overlay                  45.6G      3.2G     40.0G   7% /
10.22.125.101:gfs/vol1   45.6G      3.3G     40.0G   8% /tmp

While you are in the container, write the hostname’s value into a file which is mapped to the glusterfs volume:

1
2
3
$ echo $HOSTNAME > /tmp/data.txt
$ cat /tmp/data.txt
d469f341d836

Testing Data Persistence

Time to test the data persistence. Scale the service to 3 replicas, then hop onto a new node where a replica resides and check if the data was persisted.

1
2
3
4
5
6
7
$ docker service scale test_foo=3
test_foo scaled to 3
overall progress: 3 out of 3 tasks
1/3: running   [==================================================>]
2/3: running   [==================================================>]
3/3: running   [==================================================>]
verify: Service converged

Check where the containers are running:

1
2
3
4
5
$ docker service ps test_foo
ID                  NAME                IMAGE               NODE                DESIRED STATE       CURRENT STATE            ERROR               PORTS
jfwzb7yxnrxx        test_foo.1          alpine:latest       swarm-worker-1      Running             Running 2 minutes ago
mdsg6c5b2nqb        test_foo.2          alpine:latest       swarm-worker-3      Running             Running 15 seconds ago
iybat57t4lha        test_foo.3          alpine:latest       swarm-worker-2      Running             Running 15 seconds ago

Hop onto the swarm-worker-2 node and check if the data is persisted from our previous write:

1
2
3
$ docker exec -it 4228529aba29 sh
$ cat /tmp/data.txt
d469f341d836

Now let’s append data to that file, then delete the stack and recreate to test if the data is still persisted:

1
2
3
4
$ echo $HOSTNAME >> /tmp/data.txt
$ cat /tmp/data.txt
d469f341d836
4228529aba29

On the manager delete the stack:

1
2
$ docker stack rm test
Removing service test_foo

The deploy the stack again:

1
2
$ docker stack deploy -c docker-compose.yml test
Creating service test_foo

Check where the container is running:

1
2
3
$ docker service ps test_foo
ID                  NAME                IMAGE               NODE                DESIRED STATE       CURRENT STATE           ERROR               PORTS
9d6z02m123jk        test_foo.1          alpine:latest       swarm-worker-1      Running             Running 2 seconds ago

Exec into the container and read the data:

1
2
3
$ docker exec -it 3008b1e1bba1 cat /tmp/data.txt
d469f341d836
4228529aba29

And as you can see the data is persisted.

Resources

Please have a look and star @trajano’s repository:

Setup a Distributed Storage Volume With GlusterFS

GlusterFS is a Awesome Scalable Networked Filesystem, which makes it Easy to Create Large and Scalable Storage Solutions on Commodity Hardware.

ruanbekker-cheatsheets

Basic Concepts of GlusterFS:

Brick: * In GlusterFS, a brick is the basic unit of storage, represented by a directory on the server in the trusted storage pool.

Gluster Volume: * A Gluster volume is a Logical Collection of Bricks.

Distributed Filesystem: * The concept is to enable multiple clients to concurrently access data which is spread across multple servers in a trusted storage pool. This is also a great solution to prevent data corruption, enable highly available storage systems, etc.

More concepts can be retrieved from their documentation.

Different GlusterFS Volume Types:

With GlusterFS you can create the following types of Gluster Volumes:

  • Distributed Volumes: (Ideal for Scalable Storage, No Data Redundancy)
  • Replicated Volumes: (Better reliability and data redundancy)
  • Distributed-Replicated Volumes: (HA of Data due to Redundancy and Scaling Storage)
  • More detail on GlusterFS Architecture

Setup a Distributed Gluster Volume:

In this guide we will setup a 3 Node Distributed GlusterFS Volume on Ubuntu 16.04.

For this use case we would like to achieve a storage solution to scale the size of our storage, and not really worried about redundancy as, with a Distributed Setup we can increase the size of our volume, the more bricks we add to our GlusterFS Volume.

Setup: Our Environment

Each node has 2 disks, /dev/xvda for the Operating System wich is 20GB and /dev/xvdb which has 100GB. After we have created our GlusterFS Volume, we will have a Gluster Volume of 300GB.

Having a look at our disks:

1
2
3
4
5
$ lsblk
NAME    MAJ:MIN RM  SIZE RO TYPE MOUNTPOINT
xvda    202:0    0   20G  0 disk
└─xvda1 202:1    0   20G  0 part /
xvdb    202:16   0  100G  0 disk

If you don’t have DNS setup for your nodes, you can use your /etc/hosts file for all 3 nodes, which I will be using in this demonstration:

1
2
3
4
5
$ cat /etc/hosts
172.31.13.226   gluster-node-1
172.31.9.7      gluster-node-2
172.31.15.34    gluster-node-3
127.0.0.1       localhost

Install GlusterFS from the Package Manager:

Note that all the steps below needs to be performed on all 3 nodes, unless specified otherwise:

1
2
$ apt update && apt upgrade -y
$ apt install xfsprogs attr glusterfs-server glusterfs-client glusterfs-common -y

Format and Prepare the Gluster Disks:

We will create a XFS Filesystem for our 100GB disk, create the directory path where we will mount our disk onto, and also load it into /etc/fstab:

1
2
3
4
$ mkfs.xfs /dev/xvdb
$ mkdir /gluster
$ echo '/dev/xvdb /gluster xfs defaults 0 0' >> /etc/fstab
$ mount -a

After we mounted the disk, we should see that our disk is mounted to /gluster:

1
2
3
4
$ df -h
Filesystem      Size  Used Avail Use% Mounted on
/dev/xvda1       20G  1.2G   19G   7% /
/dev/xvdb       100G   33M  100G   1% /gluster

After our disk is mounted, we can proceed by creating the brick directory on our disk that we mounted, from the step above:

1
$ mkdir /gluster/brick

Start GlusterFS Service:

Enable GlusterFS on startup, start the service and make sure that the service is running:

1
2
3
4
$ systemctl enable glusterfs-server
$ systemctl restart glusterfs-server
$ systemctl is-active glusterfs-server
active

Discover All the Nodes for our Cluster:

The following will only be done on one of the nodes. First we need to discover our other nodes.

The node that you are currently on, will be discovered by default and only needs the other 2 nodes to be discovered:

1
2
$ gluster peer probe gluster-node-2
$ gluster peer probe gluster-node-3

Let’s verify this by listing all the nodes in our cluster:

1
2
3
4
5
$ gluster pool list
UUID                                    Hostname        State
6e02731c-6472-4ea4-bd48-d5dd87150e8b    gluster-node-2  Connected
9d4c2605-57ba-49e2-b5da-a970448dc886    gluster-node-3  Connected
608f027e-e953-413b-b370-ce84050a83c9    localhost       Connected

Create the Distributed GlusterFS Volume:

We will create a Distributed GlusterFS Volume across 3 nodes, and we will name the volume gfs:

1
2
3
4
5
6
$ gluster volume create gfs \
  gluster-node-1:/gluster/brick \
  gluster-node-2:/gluster/brick \
  gluster-node-3:/gluster/brick

volume create: gfs: success: please start the volume to access data

Start the GlusterFS Volume:

Now start the gfs GlusterFS Volume:

1
2
$ gluster volume start gfs
volume start: gfs: success

To get information about the volume:

1
2
3
4
5
6
7
8
9
10
11
12
13
14
$ gluster volume info gfs

Volume Name: gfs
Type: Distribute
Volume ID: c08bc2e8-59b3-49e7-bc17-d4bc8d99a92f
Status: Started
Number of Bricks: 3
Transport-type: tcp
Bricks:
Brick1: gluster-node-1:/gluster/brick
Brick2: gluster-node-2:/gluster/brick
Brick3: gluster-node-3:/gluster/brick
Options Reconfigured:
performance.readdir-ahead: on

Status information about our Volume:

1
2
3
4
5
6
7
8
9
10
11
12
13
14
15
$ gluster volume status

Status of volume: gfs
Gluster process                             TCP Port  RDMA Port  Online  Pid
------------------------------------------------------------------------------
Brick gluster-node-1:/gluster/brick         49152     0          Y       7139
Brick gluster-node-2:/gluster/brick         49152     0          Y       7027
Brick gluster-node-3:/gluster/brick         49152     0          Y       7099
NFS Server on localhost                     2049      0          Y       7158
NFS Server on gluster-node-2                2049      0          Y       7046
NFS Server on gluster-node-3                2049      0          Y       7118

Task Status of Volume gfs
------------------------------------------------------------------------------
There are no active volume tasks

Mounting our GlusterFS Volume:

On all the clients, in this case our 3 nodes, load the mount information into /etc/fstab and then mount the GlusterFS Volume:

1
2
$ echo 'localhost:/gfs /mnt glusterfs defaults,_netdev,backupvolfile-server=gluster-node-1 0 0' >> /etc/fstab
$ mount -a

Now that the volume is mounted, have a look at your disk info, and you will find that you have a 300GB GlusterFS Volume mounted:

1
2
3
4
5
$ df -h
Filesystem      Size  Used Avail Use% Mounted on
/dev/xvda1       20G  1.3G   19G   7% /
/dev/xvdb       100G   33M  100G   1% /gluster
localhost:/gfs  300G   98M  300G   1% /mnt

As mentioned before, this is most probably for a scenario where you would like to achieve a high storage size and not really concerned about data availability.

In the next couple of weeks I will also go through the Replicated, Distributed-Replicated and GlusterFS with ZFS setups.

Resources:

Use Swarm Managed Configs in Docker Swarm to Store Your Application Configs

Docker version 17.06 introduced Swarm Service Configs, which allows you to store data like configuration files, note that this is for non-sensitive information.

In this tutorial we will store the data of our index.html in a service config, then attach the config to our service.

Creating the Config

Create the index.html file and store it as a config:

1
2
3
4
5
6
7
$ cat > index.html << EOF
<html>
  <body>
    Hello, World!
  </body>
</html>
EOF

Store the config as nginx_root_doc:

1
$ docker config create nginx_root_doc index.html

Create the Service

Create the swarm service and associate the config with the service and set the target path where the config will reside:

1
2
3
$ docker service create --name web \
  --config source=nginx_root_doc,target=/usr/share/nginx/html/index.html \
  --publish 8080:80 nginx:alpine

Once the service is up, test it:

1
2
3
4
5
6
7
8
9
10
11
12
13
14
15
16
17
$ curl -i http://localhost:8080/
<html>
HTTP/1.1 200 OK
Server: nginx/1.15.9
Date: Thu, 28 Feb 2019 12:00:19 GMT
Content-Type: text/html
Content-Length: 52
Last-Modified: Thu, 28 Feb 2019 11:59:37 GMT
Connection: keep-alive
ETag: "5c77cd29-34"
Accept-Ranges: bytes

<html>
  <body>
    Hello, World!
  </body>
</html>

Delete the service:

1
$ docker service rm web

Delete the config:

1
$ docker config rm nginx_root_doc

Create the Service using Compose:

Doing the same with a docker-compose file, will look like the following. The first example will be where we will explicitly define our path of our secret, and will create on deploy time. Our compose file:

1
2
3
4
5
6
7
8
9
10
11
12
13
14
15
16
17
18
services:
  web:
    image: nginx:alpine
    ports:
      - 8080:80
    networks:
      - net
    configs:
      - source: nginx_root_doc
        target: /usr/share/nginx/html/index.html

configs:
  nginx_root_doc:
    file: ./index.html

networks:
  net:
    driver: overlay

Deploying our stack:

1
2
3
4
$ docker stack deploy -c docker-compose.yml apps
Creating network apps_net
Creating config apps_nginx_root_doc
Creating service apps_web

Testing our our service:

1
2
3
4
5
6
7
8
9
10
11
12
13
14
15
16
$ curl -i http://localhost:8080/
HTTP/1.1 200 OK
Server: nginx/1.15.9
Date: Thu, 28 Feb 2019 12:20:52 GMT
Content-Type: text/html
Content-Length: 56
Last-Modified: Thu, 28 Feb 2019 12:20:47 GMT
Connection: keep-alive
ETag: "5c77d21f-38"
Accept-Ranges: bytes

<html>
  <body>
    Hello, World!
  </body>
</html>

Note, that configs cant be updated, if you want to rotate a config you will create a new config and update the target in your task definition to point to your new config.

Delete the stack:

1
2
3
4
$ docker stack rm apps
Removing service apps_web
Removing config apps_nginx_root_doc
Removing network apps_net

Another example will be to point to a external config which already exists in swarm. The only change will be that we need to set the config as a external type.

Create the config:

1
$ docker config create nginx_root_doc index.html

Now that the config exists, create this compose file:

1
2
3
4
5
6
7
8
9
10
11
12
13
14
15
16
17
18
19
20
version: "3.3"

services:
  web:
    image: nginx:alpine
    ports:
      - 8080:80
    networks:
      - net
    configs:
      - source: nginx_root_doc
        target: /usr/share/nginx/html/index.html

configs:
  nginx_root_doc:
    external: true

networks:
  net:
    driver: overlay

Then deploy the stack:

1
2
3
$ docker stack deploy -c docker-compose.yml apps
Creating network apps_net
Creating service apps_web

Then testing:

1
2
3
4
5
6
7
8
9
10
11
12
13
14
15
16
$ curl -i http://localhost:8080/
HTTP/1.1 200 OK
Server: nginx/1.15.9
Date: Thu, 28 Feb 2019 12:28:11 GMT
Content-Type: text/html
Content-Length: 56
Last-Modified: Thu, 28 Feb 2019 12:28:09 GMT
Connection: keep-alive
ETag: "5c77d3d9-38"
Accept-Ranges: bytes

<html>
  <body>
    Hello, World!
  </body>
</html>

Resources:

For more information on docker swarm configs have a look at docker’s documentation

How to Validate Strings in Python With Regex

Let’s say you need to validate strings in Python. Making decisions if a string is valid or not, is what we will be looking at today.

The Scenario

We have a string that will look like this: my-random-abc-string-2947104284738593726152637836291. The abc section will always be 3 random string characters and the integers, will always be 32 integer characters, the rest will always stay the same.

Using the re library, we will create our regex expression and match them up with a input string, then if they are the same, we will pass the validation check, and make a decision from there.

The Script

Our random string generator:

1
2
3
4
5
6
7
>>> import uuid
>>> import random
>>> letters = 'abcdefghijklmnopqrstuvwxyz'
>>> def generate_string():
...     random_letters = ''.join(random.choice(letters) for x in range(3))
...     response = 'my-random-' + random_letters + '-string_' + uuid.uuid4().hex
...     return response

Our validation check:

1
2
3
4
5
>>> import re
>>> def validation_check(input_string):
...     regex = re.compile('my-random-[a-z]{3}-string_[0-9a-z]{32}\Z', re.I)
...     match = regex.match(str(input_string))
...     return bool(match)

Doing the validation check against our data:

1
2
3
4
5
6
7
8
9
10
11
>>> mystring = generate_string()
>>> mystring
'my-random-ngt-string_6346145281738193742120539836241'

>>> validate = validation_check(mystring)
>>> if validate == True:
...     print('The string {} is valid'.format(mystring))
... else:
...     print('The string {} is not valid'.format(mystring))

the string my-random-ngt-string_6346145281738193742120539836241 is valid

The function checks for a strict 32 characters in the random hex number, if you had to randomize the length, you can always use this regex:

1
regex = re.compile('my-random-[a-z]{3}-string__[0-9]+', re.I)

How to Tag All Your AWS IAM Users With Python

Let’s say that all your IAM users are named in name.surname and your system accounts are named as my-system-account and you find yourself in a position that you need to tag all your IAM users based on Human/System account type.

With AWS and Python’s Boto library, it makes things easy. We would list all our users, loop through each one and tag them with the predefined tag values that we chose.

Batch Tagging AWS IAM Users with Python

This script wil tag all users with the tag: Name, Email, Environment and Account_Type.

1
2
3
4
5
6
7
8
9
10
11
12
13
14
15
16
17
18
19
20
21
22
23
24
25
26
27
28
29
30
31
32
33
34
35
36
37
38
39
40
41
42
43
44
45
46
47
48
49
50
51
52
53
54
55
56
57
import boto3

iam = boto3.Session(profile_name='test', region_name='eu-west-1').client('iam')
paginator = iam.get_paginator('list_users')

iam_environment = 'test'

unstructed_users = []
userlist = []
taggable_users = []
already_tagged_users = []
email_address_domain = '@example.com'

# generate tag list based on account type
def tag_template(username, environment):
    if '.' in username:
        account_type = 'human'
  email = username
    else:
        account_type = 'system'
  email = 'system-admin'
  
    template = [
        {'Key': 'Name','Value': username.lower()},
        {'Key': 'Email', 'Value': email.lower() + email_address_domain},
        {'Key': 'Environment','Value': environment},
        {'Key': 'Account_Type','Value': account_type}
    ]

    return template

# generate userlist
for response in paginator.paginate():
    unstructed_users.append(response['Users'])

for iteration in range(len(unstructed_users)):
    for userobj in range(len(unstructed_users[iteration])):
        userlist.append((unstructed_users[iteration][userobj]['UserName']))

# generate taggable userlist:
for user in userlist:
    tag_response = iam.list_user_tags(UserName=user)
    if len(tag_response['Tags']) == 0:
        taggable_users.append(user)
    else:
        already_tagged_users.append(user)

# tag users from taggable_list
for tag_user in taggable_users:
    user_template = tag_template(tag_user, iam_environment)
    print(tag_user, user_template)
    response = iam.tag_user(UserName=tag_user, Tags=user_template)

# print lists
print('Userlists: {}'.format(userlist))
print('Taggable Users: {}'.format(taggable_users))
print('Already Tagged Users: {}'.format(already_tagged_users))

After it completes, your IAM users should be tagged in the following format:

1
2
3
4
5
6
7
8
9
10
11
Name: john.doe
Email: john.doe@example.com
Environment: test
Account_Type: human

or:

Name: system-account
Email: system-admin@example.com
Environment: test
Account-Type: system

Thank You

Please feel free to show support by, sharing this post, making a donation, subscribing or reach out to me if you want me to demo and write up on any specific tech topic.


Building Python Serverless Slack Apps on OpenFaas

If you are not familliar with OpenFaas, it’s definitely time that you should have a look at it, plus, they are doing some pretty awesome work!

From their documentation: “OpenFaaS (Functions as a Service) is a framework for building serverless functions with Docker and Kubernetes which has first class support for metrics. Any process can be packaged as a function enabling you to consume a range of web events without repetitive boiler-plate coding.”

Make sure to give them a visit at openfaas.com and while you are there, in the world of serverless, have a look at how Alex outlines architecture and patterns he applies in a real-world example, absolutely great read!

What are we doing today?

Today we will build a slack app using python which we will deploy as a function on OpenFaas!

Our slash command will make a request to our slack-request function, which will respond with a json string, which will then be parsed in a slack attachment message, then based on your button decision, it will then invoke our slack-interaction function, which will then respond with another message that will allow you to follow the embedded link.

The slack messages are really basic, but you can create a awesome workflow using slack apps. And the best of all, its running on OpenFaas!

Deploying OpenFaas

Docker Swarm and Kubernetes are supported, but since I am using Docker Swarm at the moment of writing, this tutorial will show how to deploy OpenFaas to your cluster. Have a look at OpenFaas Documentation for more detailed information.

Installing OpenFaas CLI for Mac:

1
$ brew install faas-cli

Deploy the OpenFaas Stack:

1
2
3
$ git clone https://github.com/openfaas/faas
$ cd faas
$ ./deploy_stack.sh

Credentials: The default configuration will create credentials for you and returns instructions on how to authorize faas-cli, for demonstration it will look more or less like the following:

1
$ echo -n <some_hash_secret> | faas-cli login --username=admin --password-stdin

The UI will be available at: http://127.0.0.1:8080. For this demonstration we will only use the cli.

Create the Functions

I will create 2 python functions:

  • The slack-request function, which will be associated to the slash command
  • The slack-interactive function, which will be used for interactivity

Create a home directory for your functions and create 2 functions:

1
2
3
$ mkdir -p ~/functions && cd ~/functions
$ faas-cli new --lang python slack-request
$ faas-cli new --lang python slack-interactive

Read the documentation if you’d like to learn more.

Configure the first function:

1
$ vim slack-request/handler.py

And our function code:

1
2
3
4
5
6
7
8
9
10
11
12
13
14
15
16
17
18
19
20
21
22
23
24
25
26
27
28
29
30
31
32
33
34
35
36
37
38
39
40
41
42
43
44
45
46
47
48
import json

def handle(req):
    data = {
        "text": "Serverless Message",
        "attachments": [{
            "title": "The Awesome world of Serverless introduces: OpenFaas!",
            "fields": [{
                "title": "Amazing Level",
                "value": "10",
                "short": True
            },
      {
                "title": "Github Stars",
                "value": "15k +",
                "short": True
            }],
            "author_name": "OpenFaas",
            "author_icon": "",
            "image_url": "https://blog.alexellis.io/content/images/2017/08/small.png"
        },
        {
            "title": "About OpenFaas",
            "text": "OpenFaaS is a framework for packaging code, binaries or containers as Serverless functions on any platform."
        },
        {
            "fallback": "Would you recommend OpenFaas to your friends?",
            "title": "Would you recommend OpenFaas to your friends?",
            "callback_id": "response123",
            "color": "#3AA3E3",
            "attachment_type": "default",
            "actions": [
                {
                    "name": "recommend",
                    "text": "Ofcourse!",
                    "type": "button",
                    "value": "recommend"
                },
                {
                    "name": "definitely",
                    "text": "Most Definitely!",
                    "type": "button",
                    "value": "definitely"
                }
            ]
        }]
    }
    return json.dumps(data)

Since our response needs to be parsed as json, we need to set the content type for our environment in our yaml configuration. Read more on it here. Edit the slack-request.yml :

1
2
3
4
5
6
7
8
9
10
provider:
  name: faas
  gateway: http://<your.gw.address>:8080
functions:
  slack-request:
    lang: python
    handler: ./slack-request
    image: <your-repo>/slack-request:latest
    environment:
      content_type: application/json

Now we need to build our image, push it to our repository like dockerhub, then deploy to openfaas:

1
2
3
4
5
6
7
$ faas-cli build -f ./slack-request.yml
$ faas-cli push -f ./slack-request.yml
$ faas-cli deploy -f ./slack-request.yml
Deploying: slack-request.

Deployed. 202 Accepted.
URL: http://your.gw.address:8080/function/slack-interactive

Configure the slack-interactive function:

1
$ vim slack-interactive/handler.py

Note that whenever your interact with the first message, a post request will be made against the interactivity request url, you will notice that I decoded the payload (but not doing anything with it), where you will find the callback_id, request_url etc. But for simplicity, I am just using a static json message to respond. Our function code:

1
2
3
4
5
6
7
8
9
10
11
12
13
14
15
16
17
18
19
20
21
22
23
24
25
26
27
28
29
import json
import urllib

def handle(req):
    urlstring = urllib.unquote(req).decode('utf8').strip('payload=')
    response = json.loads(urlstring)
    data = {
        "attachments": [
            {
                "replace_original": True,
                "response_type": "ephemeral",
                "fallback": "Required plain-text summary of the attachment.",
                "color": "#36a64f",
                "pretext": "Ahh yeah! Great choice, OpenFaas is absolutely brilliant!",
                "author_name": "",
                "author_link": "https://github.com/openfaas/faas",
                "author_icon": "http://flickr.com/icons/bobby.jpg",
                "title": "OpenFaas",
                "title_link": "https://github.com/openfaas/faas",
                "text": "Head over to OpenFaas",
                "image_url": "https://avatars2.githubusercontent.com/u/27013154?s=400&v=4",
                "thumb_url": "https://github.com/openfaas/faas",
                "footer": "Slack Apps built on OpenFaas",
                "footer_icon": "https://a.slack-edge.com/45901/marketing/img/_rebrand/meta/slack_hash_256.png",
                "ts": 123456789
            }
        ]
    }
    return json.dumps(data)

We also need to set the content type to json:

1
2
3
4
5
6
7
8
9
10
provider:
  name: faas
  gateway: http://<your.gw.address>:8080
functions:
  slack-interactive:
    lang: python
    handler: ./slack-interactive
    image: <repo>/slack-interactive:latest
    environment:
      content_type: application/json

Build, deploy and ship:

1
2
3
4
5
6
7
8
$ faas-cli build -f ./slack-interactive.yml
$ faas-cli push -f ./slack-interactive.yml
$ faas-cli deploy -f ./slack-interactive.yml

Deploying: slack-interactive.

Deployed. 202 Accepted.
URL: http://<your.gw.address>:8080/function/slack-interactive

When your functions are deployed, go ahead and create the slack app.

Create the Slack App

  • Head over to https://api.slack.com/apps and create a new app
  • Create a incoming webhook
  • Head over to slash commands and create a new command, in my case it was /supersam, set the request url to the public endpoint of your function: http://pub-ip:8080/function/slack-request
  • Head over to interactive components, set the request url for the interactivity: http://pub-ip:8080/function/slack-interactive
  • If you dont have a public routable address, have a look at ngrok

Once you are set, you should be able to see the slash command integration in your slack workspace, head over to slacks documentation if you run into any trouble.

Test your Slack App

Now that everything is good to go, its time to test your slack app running on OpenFaas!

Head over to slack and run your command /<your-slack-slash-command>. You should see this output:

When you select one of the buttons, you will get a new message:

This is a real basic example of slack apps, but slack apps are really powerful. You can for example create a slack app that deploys ephemeral environments on swarm, or create change management approval workflows etc.

I hope this was informative, I am really enjoying OpenFaas at the moment and if your have not tested it, I encourage you to try it out, its really, really amazing!

Parallel Processing on AWS Lambda With Python Using Multiprocessing

If you are trying to use multiprocessing.Queue or multiprocessing.Pool on AWS Lambda, you are probably getting the exception:

1
2
3
4
[Errno 38] Function not implemented: OSError

    sl = self._semlock = _multiprocessing.SemLock(kind, value, maxvalue)
OSError: [Errno 38] Function not implemented

The reason for that is due to the Lambda execution environment not having support on shared memory for processes, therefore you can’t use multiprocessing.Queue or multiprocessing.Pool.

As a workaround, Lambda does support the usage of multiprocessing.Pipe instead of Queue.

Parallel Processing on Lambda Example

Below is a very basic example on how you would achieve the task of executing parallel processing on AWS Lambda for Python:

1
2
3
4
5
6
7
8
9
10
11
12
13
14
15
16
17
18
19
20
21
22
23
24
25
26
27
28
29
30
31
32
33
34
35
import time
import multiprocessing

region_maps = {
        "eu-west-1": {
            "dynamodb":"dynamodb.eu-west-1.amazonaws.com"
        },
        "us-east-1": {
            "dynamodb":"dynamodb.us-east-1.amazonaws.com"
        },
        "us-east-2": {
            "dynamodb": "dynamodb.us-east-2.amazonaws.com"
        }
    }

def multiprocessing_func(region):
    time.sleep(1)
    endpoint = region_maps[region]['dynamodb']
    print('endpoint for {} is {}'.format(region, endpoint))

def lambda_handler(event, context):
    starttime = time.time()
    processes = []
    regions = ['us-east-1', 'us-east-2', 'eu-west-1']
    for region in regions:
        p = multiprocessing.Process(target=multiprocessing_func, args=(region,))
        processes.append(p)
        p.start()

    for process in processes:
        process.join()

    output = 'That took {} seconds'.format(time.time() - starttime)
    print(output)
    return output

The output when the function gets invoked:

1
2
3
4
pid: 30913 - endpoint for us-east-1 is dynamodb.us-east-1.amazonaws.com
pid: 30914 - endpoint for us-east-2 is dynamodb.us-east-2.amazonaws.com
pid: 30915 - endpoint for eu-west-1 is dynamodb.eu-west-1.amazonaws.com
That took 1.014902114868164 seconds

Thank You

Please feel free to show support by, sharing this post, making a donation, subscribing or reach out to me if you want me to demo and write up on any specific tech topic.


Sharing Global Variables in Python Using Multiprocessing

While I was using multiprocessing, I found out that global variables are not shared between processes.

ruanbekker-cheatsheets

Example of the Issue

Let me first provide an example of the issue that I was facing.

I have 2 input lists, which 2 processes wil read from and append them to the final list and print the aggregated list to stdout

1
2
3
4
5
6
7
8
9
10
11
12
13
14
15
16
17
18
19
import multiprocessing
final_list = []

input_list_one = ['one', 'two', 'three', 'four', 'five']
input_list_two = ['six', 'seven', 'eight', 'nine', 'ten']

def worker(data):
    for item in data:
        final_list.append(item)

process1 = multiprocessing.Process(target=worker, args=[final_list_one])
process2 = multiprocessing.Process(target=worker, args=[final_list_two])

process1.start()
process2.start()
process1.join()
process2.join()

print(final_list)

When running the example:

1
2
$ python3 mp_list_issue.py
[]

As you can see the response from the list is still empty.

Resolution

We need to use multiprocessing.Manager.List.

From Python’s Documentation:

“The multiprocessing.Manager returns a started SyncManager object which can be used for sharing objects between processes. The returned manager object corresponds to a spawned child process and has methods which will create shared objects and return corresponding proxies.”

1
2
3
4
5
6
7
8
9
10
11
12
13
14
15
16
17
18
19
20
import multiprocessing
manager = multiprocessing.Manager()
final_list = manager.list()

input_list_one = ['one', 'two', 'three', 'four', 'five']
input_list_two = ['six', 'seven', 'eight', 'nine', 'ten']

def worker(data):
    for item in data:
        final_list.append(item)

process1 = multiprocessing.Process(target=worker, args=[final_list_one])
process2 = multiprocessing.Process(target=worker, args=[final_list_two])

process1.start()
process2.start()
process1.join()
process2.join()

print(final_list)

Now when we run our script, we can see that our processes are aware of our defined list:

1
2
$ python3 mp_list.py
['one', 'two', 'three', 'four', 'five', 'six', 'seven', 'eight', 'nine', 'ten']

Thank You

Please feel free to show support by, sharing this post, making a donation, subscribing or reach out to me if you want me to demo and write up on any specific tech topic.


Parallel Processing With Python and Multiprocessing Using Queue

Today I had the requirement to achieve a task by using parallel processing in order to save time.

The task to be achieved

For this demonstration, I have a list of people and each task needs to lookup its pet name and return to stdout. I want to spawn a task for each persons pet name lookup and run the tasks in parallel so that all the results can be returned back at once, instead of sequential.

This is a basic task, but you could have a CPU intensive job, where it will shine better.

Multiprocesing Queues

When using multiple processes, one generally uses message passing for communication between processes and avoids having to use any synchronization primitives like locks.

The Queue type is a multi producer, multi consumer FIFO queues modelled on the queue.Queue class in the standard library. You can read more up on it here

Our Workflow

Our multiprocessing workflow will look like this:

  • We will define our data, which will be a dictionary of people and their pet names
  • We will define an output queue
  • Create a example function that will produce each task to the queue
  • Then we will setup a lost of processes that we want to run
  • From the list of processes that we defined, we will run each process, then wait and exit the completed processes
  • We will then consume from the queue. For each process in our processes list

Note that I also added a delay of 2 seconds, so that you can see that the tasks are run in parallel, so the delay will only be 2 seconds.

Our code:

1
2
3
4
5
6
7
8
9
10
11
12
13
14
15
16
17
18
19
20
21
22
23
24
25
26
27
28
29
30
31
32
33
34
35
36
37
38
39
import multiprocessing as mp
import random
import string
import time

pet_maps = {
        "adam": {"pet_name": "max"},
        "steve": {"pet_name": "sylvester"},
        "michelle": {"pet_name": "fuzzy"},
        "frank": {"pet_name": "pete"},
        "will": {"pet_name": "cat"},
        "natasha": {"pet_name": "tweety"},
        "samantha": {"pet_name": "bob"},
        "peter": {"pet_name": "garfield"},
        "susan": {"pet_name": "zazu"},
        "josh": {"pet_name": "tom"},
    }

pet_owners = pet_maps.keys()

output = mp.Queue()

def get_pet_name(data, output):
    time.sleep(2)
    print('adding to queue')
    response = 'pet name: {}'.format(data)
    output.put(response)

processes = [mp.Process(target=get_pet_name, args=(pet_maps[name]['pet_name'], output)) for name in pet_owners]

for p in processes:
    p.start()

for p in processes:
    p.join()

print('consuming from queue:')
results = [output.get() for p in processes]
print(results)

Running the example:

1
2
3
4
5
6
7
8
9
10
11
12
13
14
$ python3 mp.py
adding to queue
adding to queue
adding to queue
adding to queue
adding to queue
adding to queue
adding to queue
adding to queue
adding to queue
adding to queue

consuming from queue:
['pet name: max', 'pet name: sylvester', 'pet name: fuzzy', 'pet name: pete', 'pet name: cat', 'pet name: tweety', 'pet name: garfield', 'pet name: bob', 'pet name: zazu', 'pet name: tom']

Thank You

Please feel free to show support by, sharing this post, making a donation, subscribing or reach out to me if you want me to demo and write up on any specific tech topic.